 |
| Hausler 450 V2 RC Helicopter |
RC 450 Helicopter Kit (Blue)
Clarification.
Now for clarity I want say I am not trying to be deceptive by saying I built this entire helicopter for
less than $100. I did have a few parts laying around that I incorporated in to the build such as the transmitter and receiver, and few servos. These are things that I had from building a few foam board airplanes. But the reason I bring this up is that if this us your first helicopter build and you do not have anything laying around then maybe you should rethink building this large of a helicopter.
This is NOT a toy grade helicopter that you build for or give to a child. This is a hobby grade machine that can cause serious injury if you are not safe. The blades are made of either fiberglass or carbon fiber and very stiff and will cut you bad if they hit you at full RPM. If you are not an experienced pilot then maybe you need to explore the micro line of 4 and 6 channel Helicopters prior to this build. Such as the WL V911 4 CH Single Rotor Helicopter found here. This is a really good heli to get you into flying something more than an AirHogs style infrared indoor heli. There are also a ton of cheap replacement parts and upgrades available for this Heli.
Before you begin.
Before we can build the Hauser $50 V2 kit we will need some instructions, since there are none included in the kit. I searched and found a couple of downloadable pdf versions that I will share with you here. You will need Adobe's PDF viewer to open them.
Hausler 450 Parts List - Parts Break Down and Part Numbers.
Hausler 450 V2 Build Guide - Kit Assembly Manual..
Hausler 450 V2 User manual. - RTF user manual, but has some useful info on setup in it.
The manual guides you on how to build the unit. It is not great but between it and the web you should be able to get it put together. I am not going to give you a complete build guide but will highlight some trouble spots you may run into while building this Helicopter.
 |
| Hausler kit arrives in a small box |
When your kit arrives you will be surprised by how small the box is. When you order a ready to fly kit that is partially assembled it comes in a rather large retail box with the transmitter and other things. This one comes in a small box with everything snugly packaged inside. A lot of the heli is preassembled for you, but we will discuss that later. Inside the different sections are individually heat sealed in a heavy plastic bags.
 |
| Everything is crammed in pretty tight |
The main heli chassis is completely assembled with the exception of the bottom tray and battery bracket. S\o is the Rotor Head and tail rotor assy. The first recommendation I can make is to remove every Metal to Metal (MM) screw in all these assemblies and apply lock tight to them and then re-install them. My experience is that many of them were already done, but there we several that were not. By disassembling everything you will also be able to inspect and setup everything yourself. A very important thing in my opinion. While I was doing this I discovered a few things that otherwise could have possibly ended in a crash had I not repaired them.
 |
| Parts bagged by section |
This is of course a Chinese clone of and Align Trex Helicopter, but for a fraction of the cost of the Align. Without debating the legality / morality of buying clones, we have to keep in mind that many of us would seriously not be able to enjoy any part of this hobby if they did not exist. I think it is lost on some that because the clone versions gets us into the sport that eventually we will want more and will migrate to the higher end and better quality stuff.
Finishing
 |
| Rough Edges on Canopy |
As far as the metal pieces they all seamed pretty good quality and finished very nicely. The only thing of note I had was on some of the anodized blue pieces there was a residue left over from some kind of coolant or cleaning solution. But this wiped right off and the part looked nice again. I did not check any of the specs on the parts with a caliper or micrometer to check specs and tolerances. A good time to check those will be when I replace a part with an align product and want to compare the specs.
 |
| Missing Bushing |
While checking all my screws I found a bushing missing from my tail that would have definitely caused an issue with stability and control. So make sure you check everything. A lot of bad reviews of helis and planes like this come from lack of proper prep when your setting them up. Even and RTF bird that you receive should receive a once over and check everything out, regardless of the manufacturer. I did find a couple of defective parts, but I was fortunate enough hat the seller was very helpful and sent me replacements right out. I find this to be the case most of the time.
 |
| Crooked Fly Bar Paddle |
 |
| Stripes added to Tail Rotor |
Other than these small finishing issues I really thought the overall quality of the kit is pretty good, considering the price. If you take some time and do the finishing work yourself, maybe upgrade/or replace a few parts and take time to set it up this can be an amazing bird to build and fly.
Components I Used
As I said when I started I used some things I had laying around the shop, so I will list those as a
 |
| Hobbymate 3800Kv Motor |
Items I bought
RC 450 Helicopter Kit (Blue)
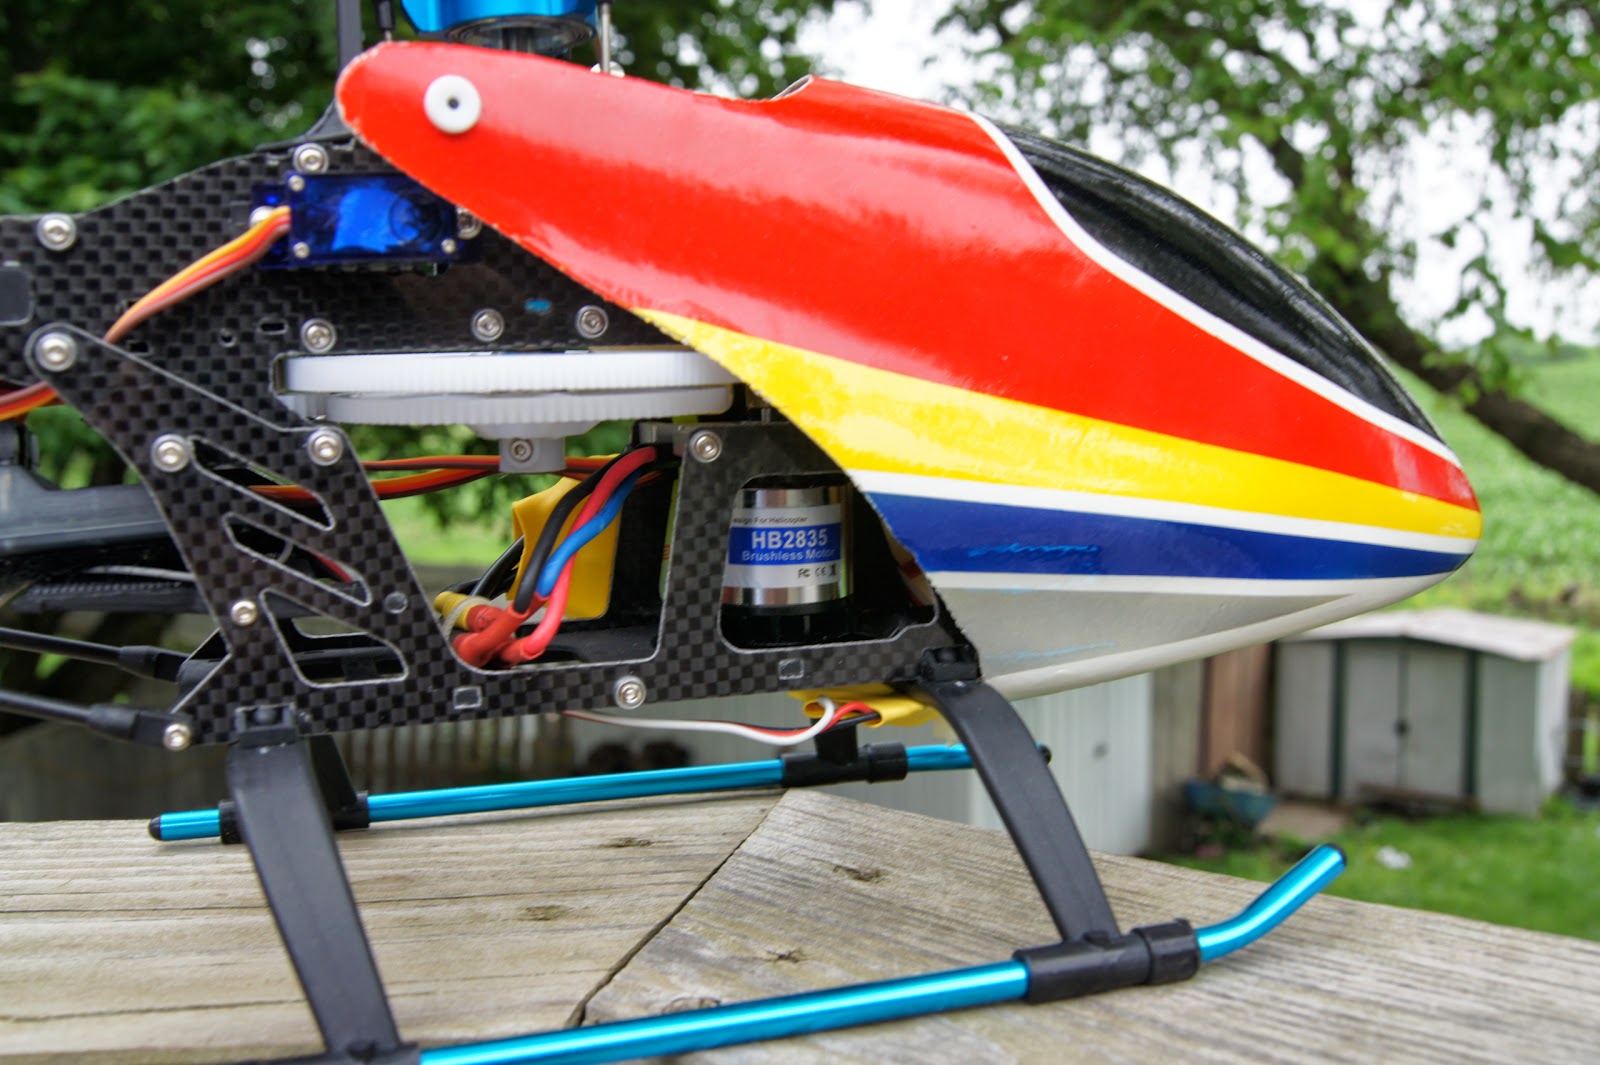
Hobbymate HB2835H - $16.90 - 3800Kv Brushless Motor
Hobbypower G401B - $11.47 - Head Lock Gyro (GY401 Clone)
EMAX ES09D Servo - $10.94 - Dual Bearing Digital Tail Servo
Sub-Total -- $99.31
Items I already Had
TowerPro SG90 9G - $3.49 ea x3 (you can but these cheaper on Ebay in lots of 10 at a atime.)
FlySky FS-T6 2.4ghz Digital Proportional 6 Channel - $55 - A great affordable radio with receiver. That is similar in functions to a Spektrum DX6
Turnigy 2200mAh 3S 20C Lipo Pack - $18.73 with shipping - Battery pack for flight.
Mystery 50A Brushless ESC BEC
Sub Total - $98.54
Grand total for all items - $197.85 - Complete ready to fly bird.
 |
| Metal Head and T-pro Servos |
Conclusions
The Hausler V2 450 Clone is actually a pleasant surprise to me. Having dealt with the quality issue
 |
| 50 Amp ESC mounted on Hausler 450 |
Recommendations and Build Tips
There are a few recommendations I will make concerning this kit. They are not required but I feel they make this a better helicopter to fly and improve the safety and performance as well.
 |
| Wrong Servo Rod Angle |
Second is the screws. I did notice a little inconsistency in the heads of the screws and bolts in this unit. Align sells a kit that has all their screws and spares for these. I would recommend upgrading to those for sure. Nothing is worse on a small helicopter than a stripped screw head you can't tighten or remove.
 |
| Finished Hausler 450 V2 |
up like the picture at the left with a steep angle on your Servo rod and this will affect performace. You need to reverse your servo mount spacers for this to work.
The last parts bag you will need is the one with the foam blade supports and the zip ties in it. There is a 1.5mm allen wrench in that bag in case you don't find one in your tool box.
Comments